
Chimney Top Dampers
These are most usually fitted to large square chimney stacks (as opposed to pots or lined flues), with large inglenook fireplaces below. In such fireplaces, which might be a metre deep by several metres across, a fireplace damper is often impractical. A top damper when closed, will also shed rain, and keep birds out of the flue. The downside is that access to the top of the chimney is required both to measure up, and to fit. You should also consider the possible need to provide safe access for maintenance in the future.

As a rule my chimney top dampers are robustly made from 3mm and 2mm stainless steel for maintenance free operation. I make them so they partially insert into the flue , as well as being screwed to the top bricks/stones. This, along with their weight ensures they will not be moved by even the foulest of weather or the roughest of sweeps!

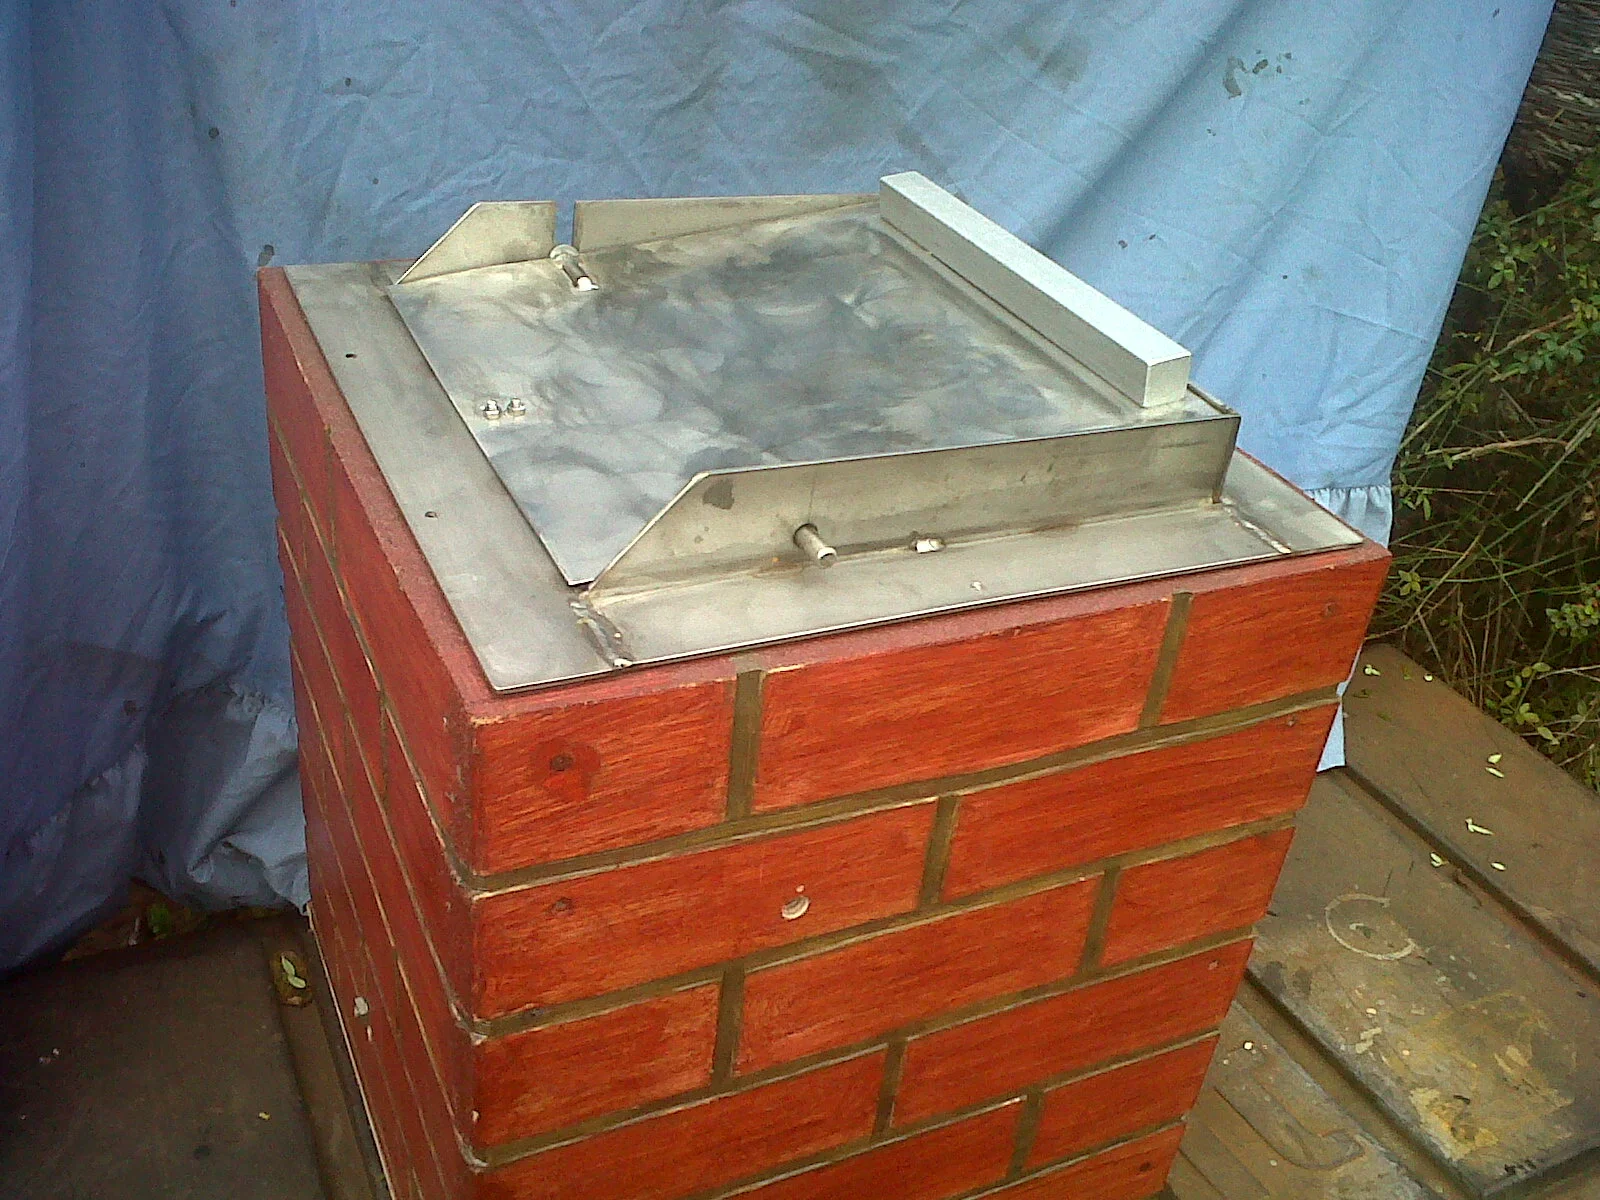
With these dampers the flap is hinged off centre, and counterweighted so it drops open by default. A handle attached to a stainless steel cable is pulled and “parked” at the hearthside to close the damper. It’s never happened yet – but doing it this way means that should the cable break, the damper will be left in the open position rather than closing and preventing use of the fireplace pending repairs.
Chimney top damper fitting:
Given safe access to the chimney top, fitting these dampers is fairly straightforward for a competent tradesman. Note, the flap is removable from the frame to ease fitting/maintenance if necessary, but there is a bit of a knack to it!
Measuring up: Please give me the internal size of the chimney stack at its smallest unless you’re prepared to chisel/grind any protruding bricks to allow the damper to be inserted. Note that the majority of the flap drops down into the flue when opened, so bricks sticking out in the first few courses down may create a problem. I’ll make the damper fractionally undersized to make sure it goes in! I also need the approximate height. from the top of the stack to the hearth. You’ll need to cut the operating cable to size, but an estimated length saves me wasting cable.
The flange is drilled to allow you to mechanically fix the damper to the stack – be careful not to overtighten fixings as you could twist the frame preventing the damper flap from moving freely and opening/shutting positively. I test and adjust each damper on the work bench before sending them out - I know they open and close freely when the frame is sat on a flat surface, so if yours doesn’t you may need to chisel off protruding bits of mortar and or loosen/tighten fixings to make sure the frame is flat and square.
Again, in an ideal world, apply a little flaunching to the top of the stack and over the flange once the damper is in place, to shed rainwater.
The cable attached to the bottom of the flap should be dropped down the flue (you may need to tie a hammer or other weight to the end, but normally in an inglenook flue it will just drop to the hearth.)
The fiddliest part of the operation is fitting the handle and retaining hook at the hearthside. You will have noted that the damper is counterweighted to drop open by default. The handle has a spring within it, so that it can maintain tension on the damper in the closed position. This does mean you need to adjust the length of the cable carefully so the large ring at the bottom of the handle will just pass over the retaining hook with the damper closed and the spring at full extension. The retaining hook should be fitted in a convenient position on the wall of the fireplace so the pull upwards to the damper flap will be as direct as possible.
The effective length of the cable is adjusted by passing the end of the cable through the small eye at the top of the handle, forming a loop, and securing with the cable grip supplied.
The best tool to cut off excess cable is a thin metal cutting disc on an angle grinder – do wear goggles and be careful a) not to hurt yourself, b) not to leave sharp strands of stainless steel cable exposed where someone might puncture themselves, and c) not to accidentally cut through the main part of the cable!
Wrapping tape around the cable before cutting will help keep the cut neat.
A guide eye is included, which you can use, if necessary, to make sure the handle stays just above the hook when it’s released, rather than swinging into the middle of the fireplace. There’s enough of a gap at the back of the eye to allow the cable to be slid in – so you can fit the guide eye at the end of the job without having to thread cable through it before fitting the handle.
The wall plugs supplied require a 10mm hole.
Do be careful not to shut the damper without checking your fire is well and truly out!!
DO NOT install a damper to a flue serving a gas fire
If you have any queries about fitting, call Will on 07947 273589, or email chimneydampers@yahoo.co.uk and I’ll try to help.
Fitting one of these dampers should make a great difference to the room, and the house, by reducing draughts and preventing centrally heated air from shooting out of the chimney 24 hours a day. I’d love to hear any feedback you have once you’ve had the damper in place for a while !

Chimney top damper kit ; Damper with cable attached, Guide Eye, Wire rope grip, Retaining hook, Sprung handle